When you purchase a back up drive (external drive or thumb drive) off the rack, often they are labeled for both PC and MAC.
Storing your files on the computer’s hard drive is the recommended place to save your files, NOT in the cloud. The majority of graphic designer still save work on their local hard drives.
If you own your own computer, it is prudent to always back up your files on an external drive on a regular basis. Back-up software is included with the MacOS.
Portable external Hard Drives are not expensive and you can use then to back up your hard drive, or transfer files.
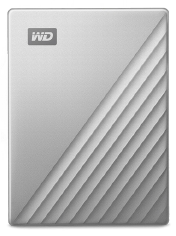
I recommend Western Digital external drives for backing up work. I have had good luck with these over the years.
Apple computers come with a back up program called Time Machine.
BEWARE! PCs and Macs do not play well together in the digital drive space. Macs can read a disk with PC formatting on it, but PC’s cannot read Mac formats.
So, if you have both platforms and need to have files from both, you are stuck, and you risk having your Mac data corrupted at some point.
So, if you are solely using a MAC, then I recommend formatting your external drives to MacOS. That way you have a better chance of your data staying safe. This is not a guarantee, but the software on the external drives that enable the drive to be read can corrupt your files. When you purchase drives off the shelf from stores and they are marketed to be compatible for both MacOS and Windows, there is software on the disk that enables that to happen, and that is where the issue happens with your data getting corrupted. It is far safer to reformat your drive to be compatible with the type of operating system your computer is running.
HERE IS HOW TO REFORMAT YOUR EXTERNAL DRIVE AND/OR THUMB DRIVES
Caution: If you reformat your drive to MacOS, the drive cannot be read by a PC.
1. Go to your applications folder: File/New Finder Window/ Applications/Utilities/Disk Utility
2. Open Disk Utility.

3. Select the external drive you want to format.
4. Click on the Erase icon in the menu above the drive.

BE NOT AFRAID …
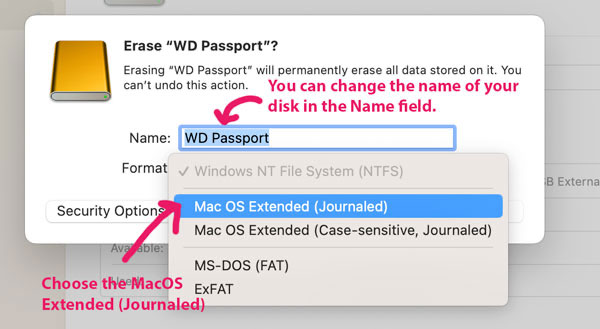
5. A popup menu will appear. You can rename your drive if you’d like.
Choose MacOS Extended (Journaled)
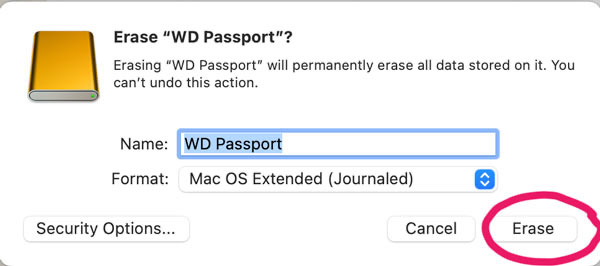
5. Click on the Erase button.
6. Your drive will be erased and reformatted. If you have data on the drive you will most likely get an alert
To be sure you want to erase it. Just say yes. If it’s a new drive, it won’t take long to erase.