There are several Adobe programs that do not embed images into them. AfterEffects is one and InDesign is another.
Please review the slides below to get familiar with each program, when and why to use them for your projects!
Why package your InDesign files?
There are times when you need to share your native InDesign files with colleagues. It is also helpful to send them to the printer incase there are issues that can be fixed in prepress. however in this day and age, designers now have to wear many hats in the creation process. The best practice that all competent designers do is PROOF and PREFLIGHT their documents BEFORE they create a PDF file, or Package them.
How to Package Your InDesign Files Properly for Printing
Step 1: PROOF YOUR DOCUMENT
- Run Spell Check in your InDesign Document: EDIT / SPELLING / CHECK SPELLING
the quick key on the MAC is command i
Step 2: PRE-FLIGHT YOUR DOCUMENT
- In your InDesign document find the Preflight Menu. Go to: WINDOW / OUTPUT / PREFLIGHT
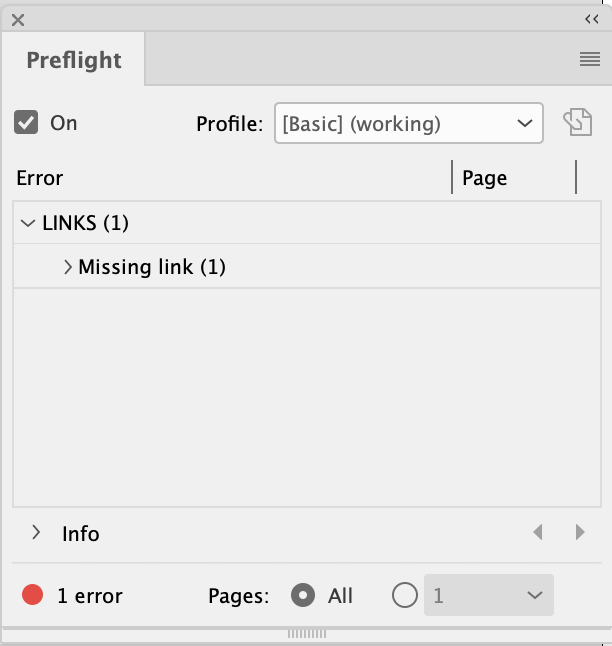
Notice the red dot that is signaling an error in the document. If there are no errors the dot will be green.
You can also access the Preflilght Panel in the bottom left-hand page of your InDesign document.
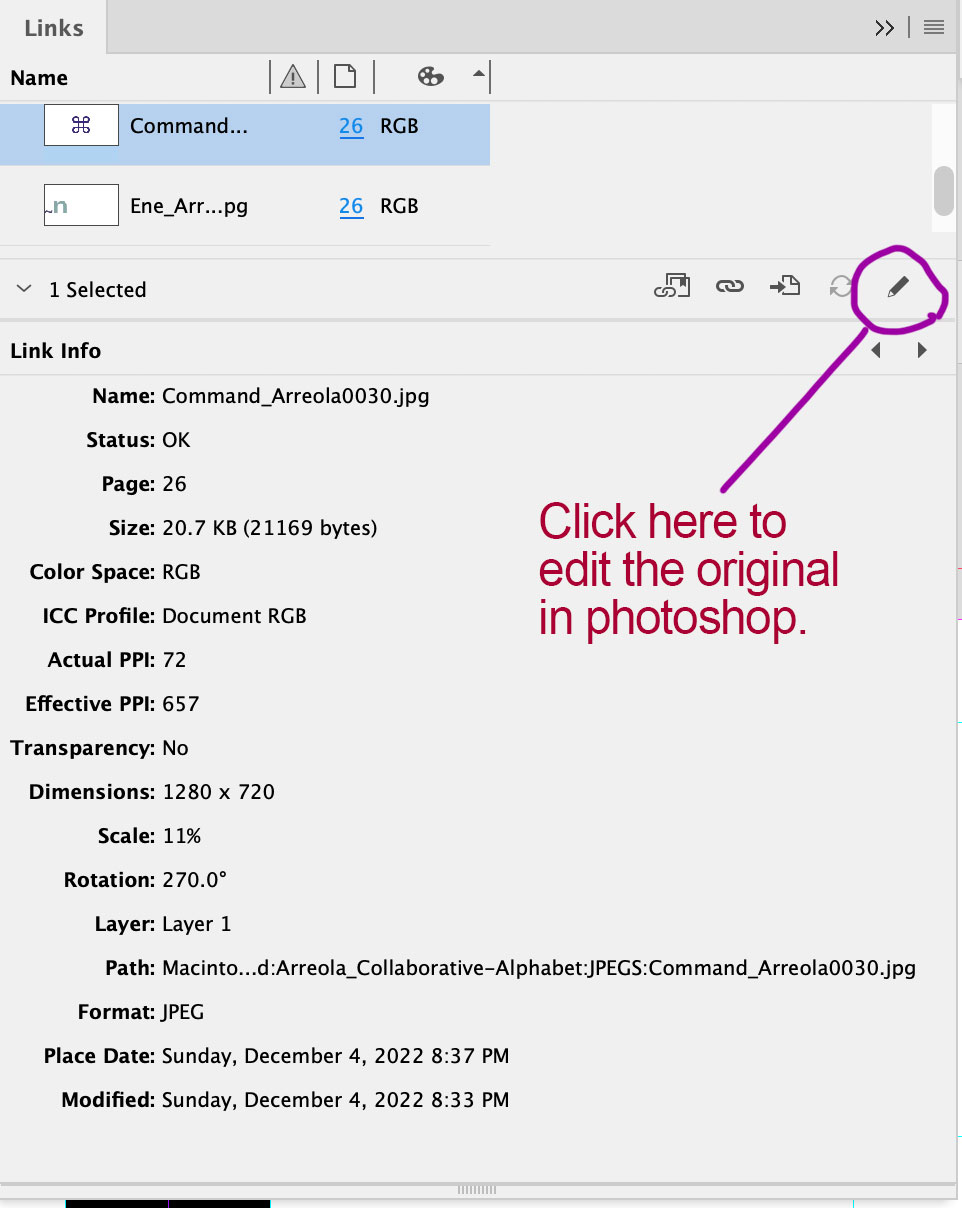
In the example above, it indicates that there is a missing link. To display the missing link go to your LINKS menu: WINDOW / LINKS
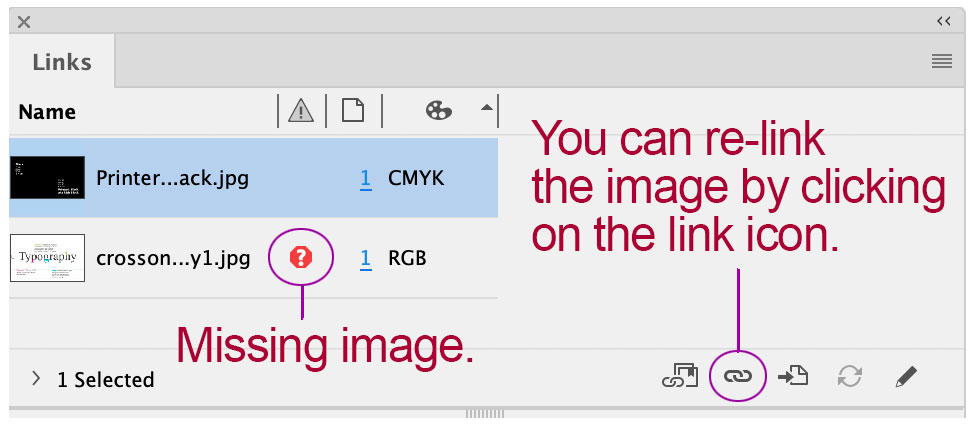
You can see that the missing image has a red question mark icon next to the file name. Click o the Link Icon shown in the diagram.
This will open a finder window for you to locate the missing image file.
Step 3: SAVE YOUR DOCUMENT
Step 4: CHECK YOUR IMAGES FOR THE CORRECT COLOR MODE
- All print-ready artwork with images must be converted to CMYK (printer’s inks) from digital color (RGB).
Digital cameras take images in RGB mode and all web images are in RGB mode.
If you recall design foundations, ADDITIVE COLOR creates the color through mixing LIGHT.
Printing technology is SUBTRACTIVE COLOR and does the job by mixing PIGMENTS (or INK).Project slated to be produced in PRINT must be converted to the correct color mode which is CMYK.Note: Color can and will shift when you change color modes. Therefore, it is important to know what color mode is recommended by the particular print process you are using. There are some print processes where you can use RGB color mode. As print technology changes, designers need to be aware of this situation.
For off-set press work, you need to convert the files to CMYK. Always check with the specific printer you are using on a print job to be sure what color mode is acceptable for their particular equipment.
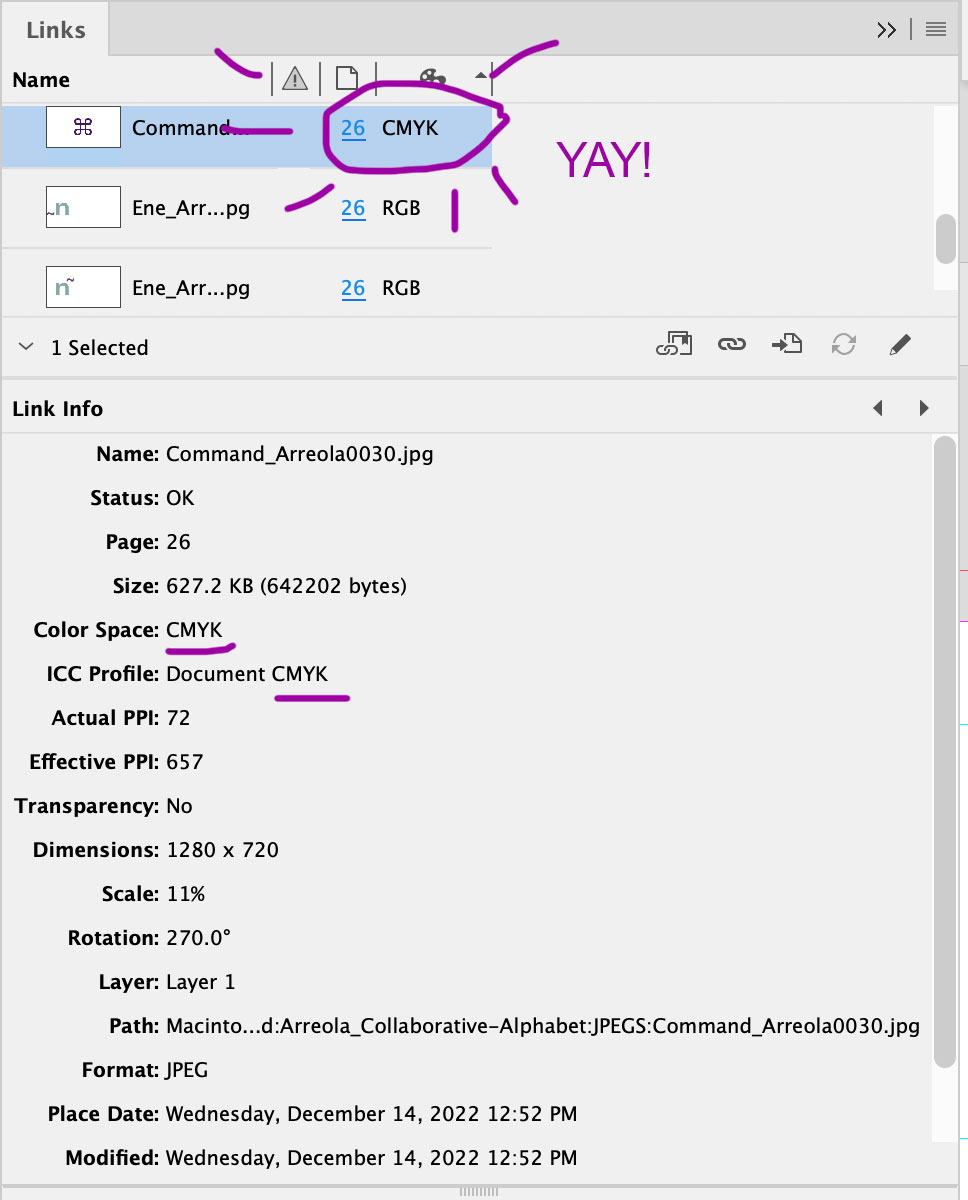
- TO CHANGE YOUR RGB IMAGE to CMYK, go to your LINKS MENU: WINDOW/LINKS
Look for any images that are noted as RGB color space.


CLICK on the PENCIL ICON (EDIT ORIGINAL).
Note: If you have mapped your image files (JPG, PSD, PNG) to open in Adobe Photoshop,
they will automatically open in Photoshop where you can easily change the color mode.To map your images to open in Photoshop, locate any JPG, JPEG, PSD, and PNG on your computer. Select the file, press COMMAND I to get INFO on the object.
NOTE … PUT A LINK TO ANOTHER PAGE TO SHOW HOW TO DO THIS!!!!
WHEN YOU HAVE OPENED YOUR IMAGE IN ADOBE PHOTOSHOP
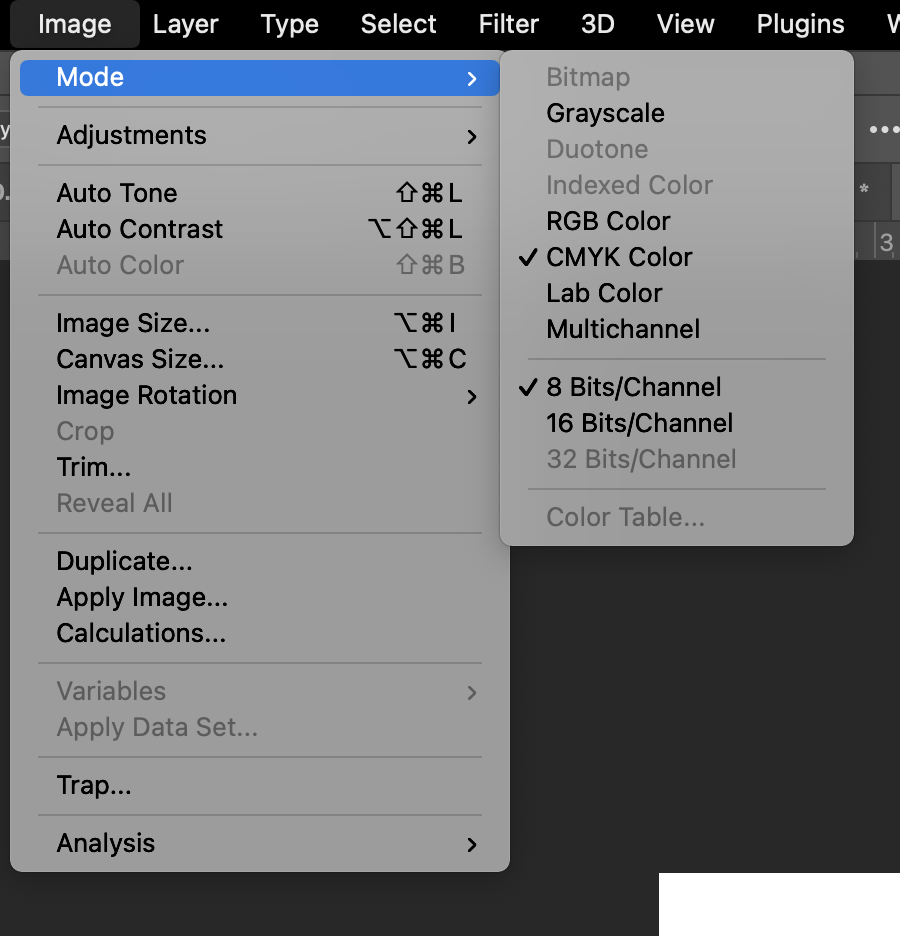
Go to: IMAGE / MODE
As you can see in the image below, the image is in RGB Color Mode.
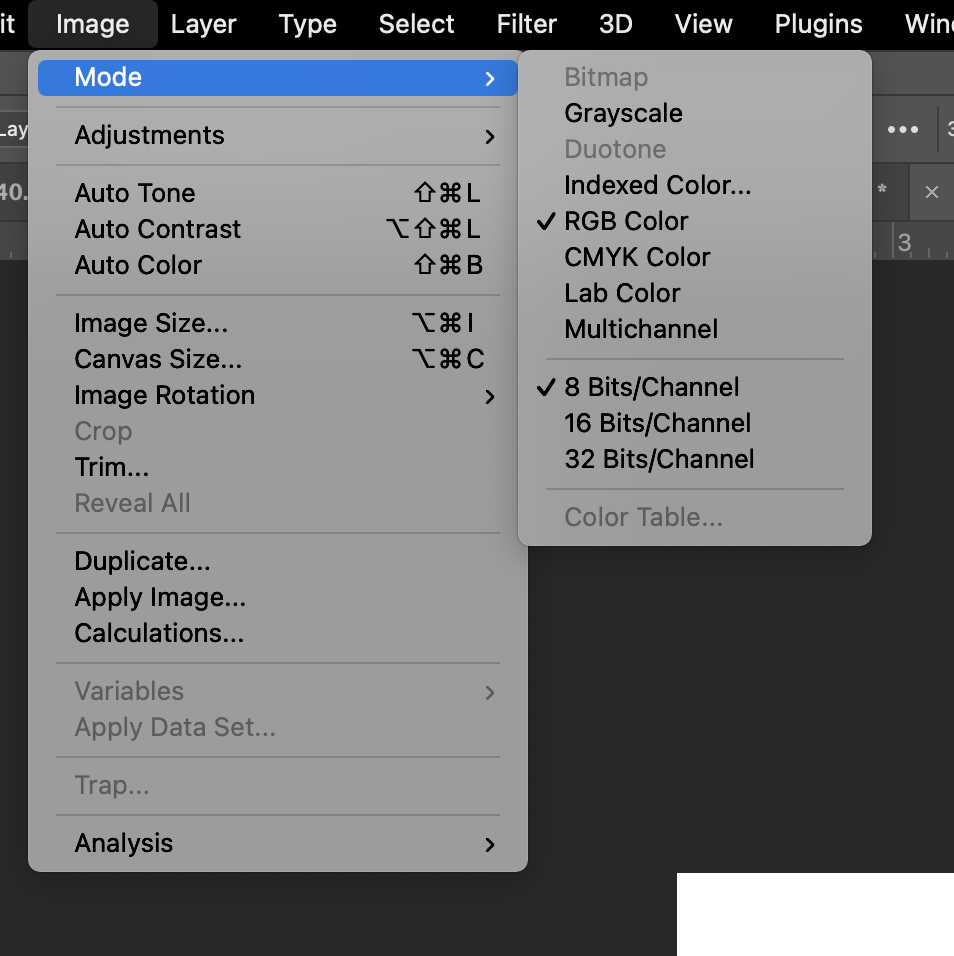
CHANGE THE MODE TO CMYK BY SELECTING CMYK COLOR.
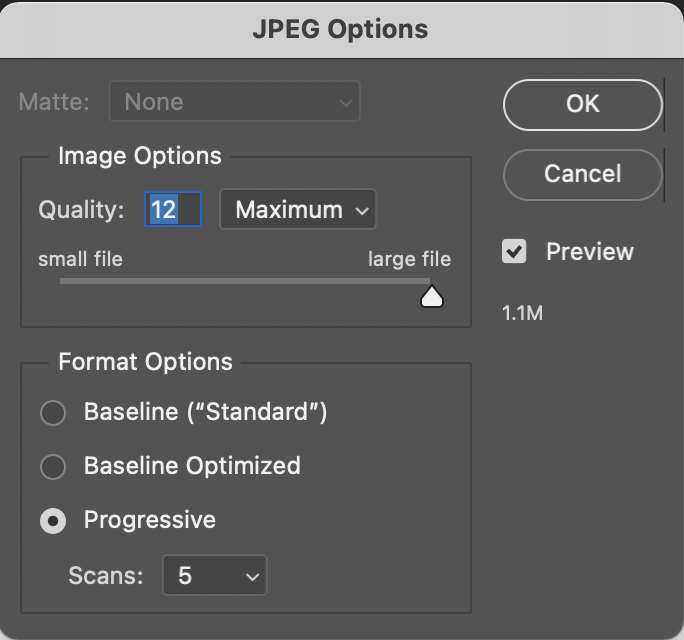
IF THIS WAS A JPEG, SAVE IT OUT AGAIN AND BE SURE TO CRANK THE IMAGE QUALITY TO MAXIMUM.
If the image is a PSD file, you can simply save it.
If it is a PNG, you can save it.
THE IMAGE FILES WILL AUTOMATICALLY UPDATE IN YOUR INDESIGN DOCUMENT!
LOOK IN YOUR LINKS MENU IN YOUR INDESIGN FILE TO SEE THAT THE IMAGE IS NOW CHANGED TO CMYK.
YOU WILL HAVE TO CONVERT ALL OF YOUR IMAGE FILES TO CMYK BEFORE YOU CAN PACKAGE THE FILE.
So repeat the process going through the Links Menu to find any RGB images and convert therm.
It can be a tedious process, but if you have linked. your files properly and have mapped your images to open the correct Adobe applications, it shouldn’t take you very long.
Step 5: SAVE YOUR FILE.
Step 6: CREATE A PRESS QUALITY PDF OF YOUR FILE.
Pay attention to these steps as making a PDF in INDESIGN is different from making one in ILLUSTRATOR.
Adobe hasn’t quite made all their products with the same identical interface and nomenclature.
In Illustrator we are used to SAVE FILE AS, to ensure we are not converting the open AI file into a PDF, thus making change unawares to a changed open PDF file and finding out later that you have been editing a PDF file. RIGHT?
And when we make a PDF file, we select that when we are saving it. RIGHT?
And when we need to add the TRIM marks and BLEEDS to the PDF, we choose TRIMS and USE DOCUMENT BLEED SETTINGS. RIGHT?
IN DESIGN WORKS DIFFERENTLY AND USES DIFFERENT TERMINOLOGY!!!
InDesign has built in PDF making into their menus as it is the workhorse for print design and prepress.
TO MAKE A PDF FROM INDESIGN …
- SAVE your document.
- Go to: FILE / ADOBE PDF PRESETS / [PRESS QUALTY] …
- BE SURE TO NAME YOUR FILE … Often I will append the name of my FINAL PRINT FILES with the term FINAL. Sometimes I will make sure that I note that there are crop marks on them. I will tell you why in a second.
- Direct your file into your PROJECT FOLDER (Surely you made one right?)
In the PDF menu that appears, go to the MARKS and BLEED menu in the left-hand column.
HERE IS WHERE IT GETS TRICKY!!!
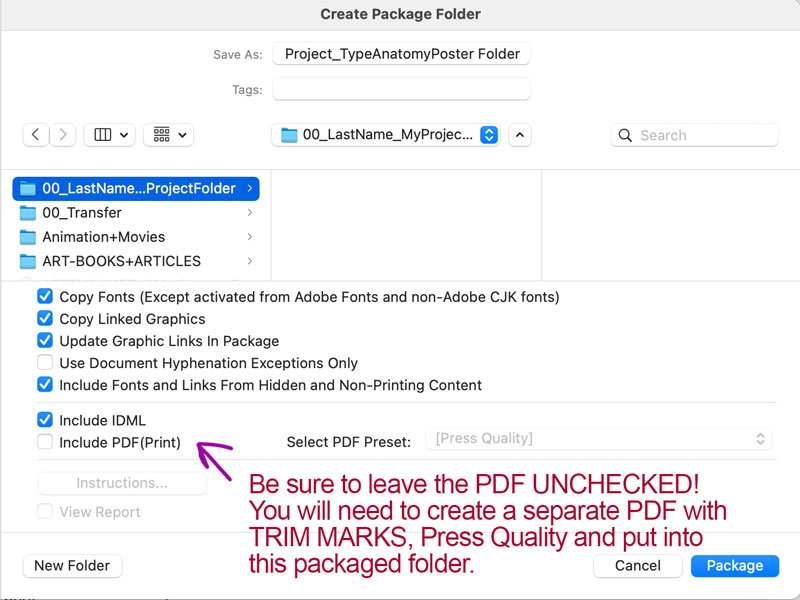
YOU’LL WANT TO CHOOSE: CROP MARKS and USE DOCUMENT BLEED SETTINGS
NOT BLEED MARKS!!!!!
The terminology in InDesign differs from Illustrator.
TRIM MARKS in Illustrator = CROP MARKS in InDesign
IMPORTANT NOTE: The reason why I am having you make a separate PRESS QUALITY PDF file with the CROP MARKS on it is because, when you package an InDesign file, it can make a PDF file, but it DECEIVES YOU! It will make a PDF file, but will NOT INCLUDE the CROP MARKS, or Bleed Settings that you need. This is if you are using the application right out of the box without customizing it … SO IT IS BETTER TO MAKE YOUR PRINT FILES INDEPENDENTLY FROM THE PACKAGE.
ALWAYS PROOF YOUR PDFS TO MAKE SURE YOU HAVE YOUR BLEEDS AND CROPS!!!

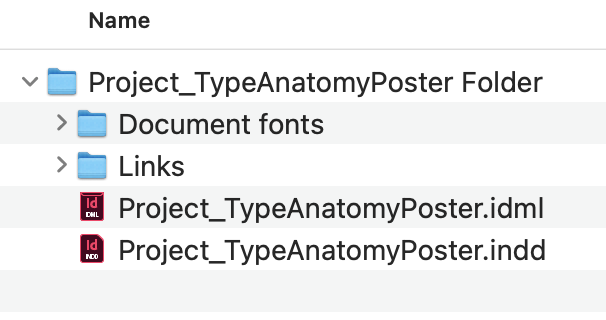
Step 7: PACKAGE YOUR INDESIGN FILE.
You are now ready to package your InDesign file. I know, you thought you were all done when you finished designing your last page!
There is much attention to detail to get your files prepared to go to the printer. And you don’t want to get the reputation that your files always have to be fixed at the printer! This will cost your employer and/or client time and money. And time and money is something that all designers need to be aware of.
Hopefully I have impressed upon you the reason why we, as good competent designers need to know how to handle ALL aspects of design AND production.
I will get off my soap box now.
Here we go!
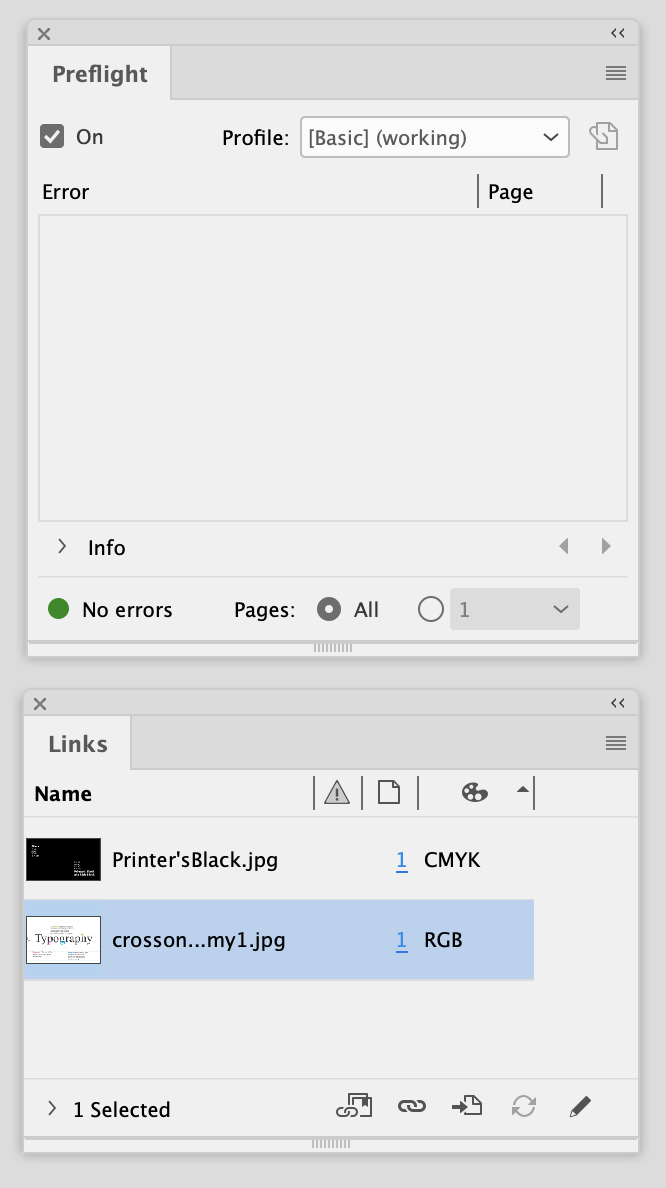
When you are ready to Package your document, ALL of the errors should be taken care of and you should see a green dot at the bottom of your page.
CREATE YOUR PDF INDEPENDENTLY OF THE PACKAGING PROCESS!
And you will have to do this all over again. TRUST ME. When you are at the end of a project, MISTAKES HAPPEN WHEN YOU ARE RUSHED!
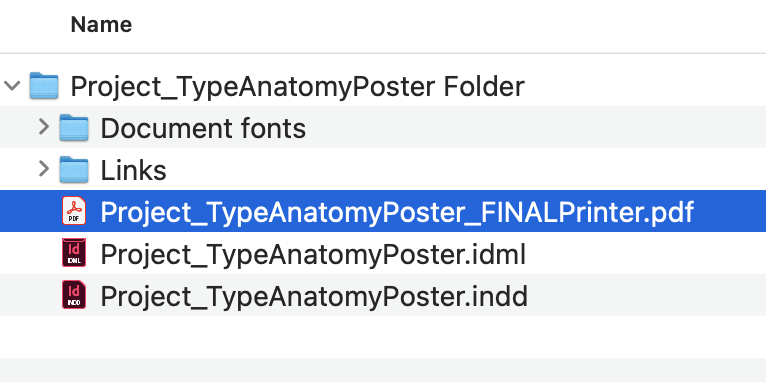
Step 8: INSERT YOUR PDF INTO THE PACKAGED FOLDER
- Locate the PRESS QUALITY PDF you made in STEP 6 and drag it into the PACKAGED FOLDER.
Step 9: ZIP YOUR PACKAGED FILE: CONTROL + COMPRESS FILE
And now you can get a cup of coffee!
JOB WELL DONE!