What is a bleed?
In printing, when a design goes to the edge of the page it requires a production technique called a bleed. The purpose of adding a bleed to your document ensures when the finished print is trimmed there are no white lines showing on the edge of the page.
EXAMPLE
Say you want to create a page that has the color yellow going to the edge on all four sides of the page. You are planning to print on white paper stock. In order to achieve the result you want, you will have to create a bleed on your mechanical. The Adobe software enables you to easily add a bleed to any document when you first set up the file.
Bleeds are created in the set-up screen. There are parameters for Bleed in the Preset Detail area.The common measurement for a bleed for off-set printing is 1/4″ or .25″. In the screen shots below, notice that the lock icon is turned on so that you only have to type in the 0.25 in dimension in the first field. Press the TAB key and the other three positions will be populated.
Sometimes, depending upon the publication specifications, you may need to put different measurement in each position. But for this example, we will use the same measurement on all four sides of the document.
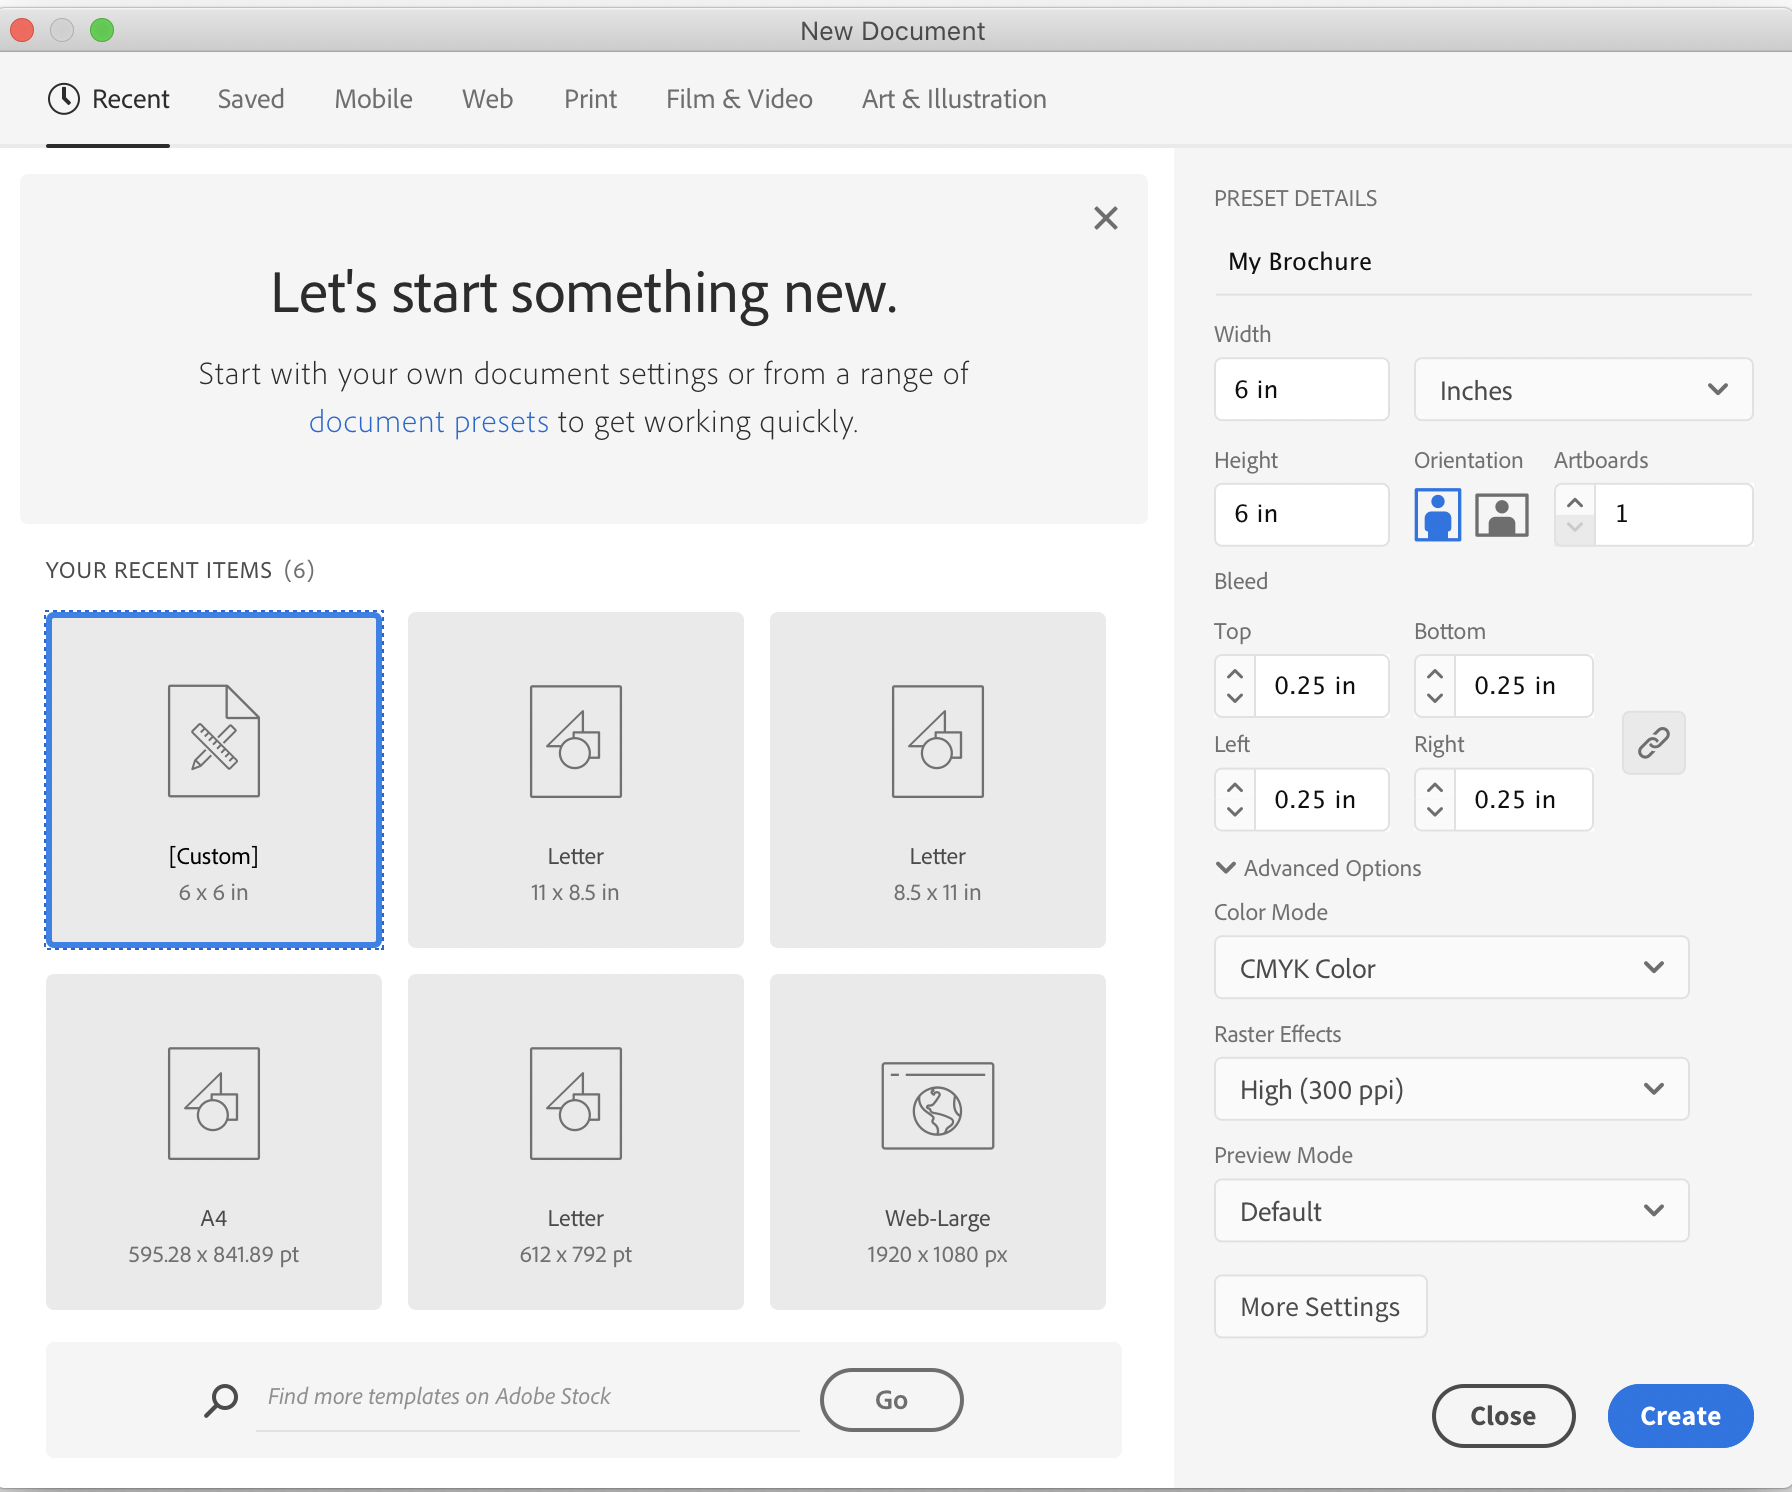 ILLUSTRATOR SET-UP SCREEN
 I
I
IN-DESIGN SCREEN SET-UP
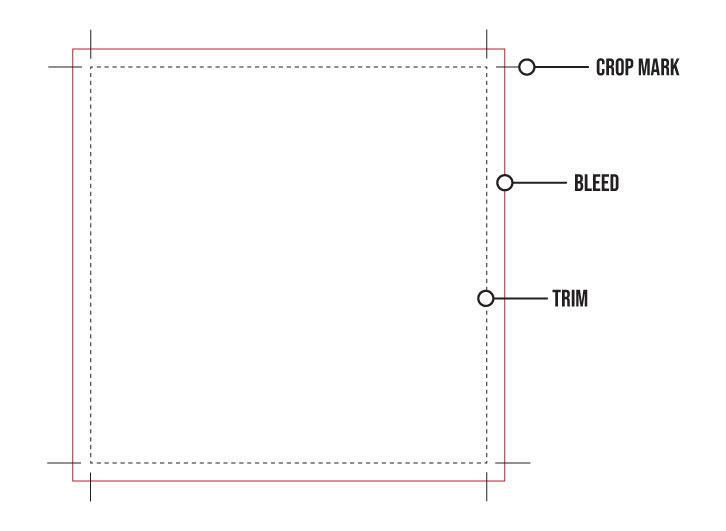 The illustration above indicates where the document will trim, and where the bleed area is. On the mechanical, or art board,
the color that is planned to align to the edge of the page, needs to extend beyond the trim area by traditionally 0.25″ (1/4″).
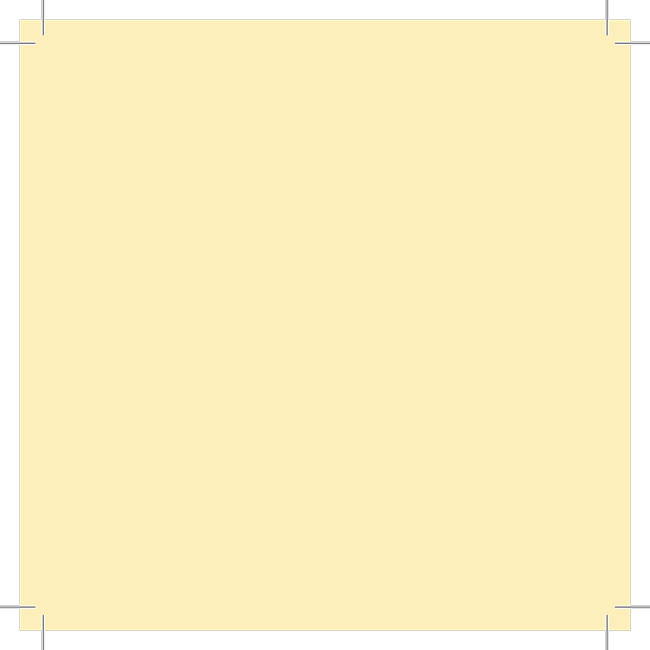
The Image above illustrates what this page looks like with crop (trim) mark. Notice how the color extends past the trim marks.

The Image above what this page will look like when it is trimmed at the final size (or trim size).
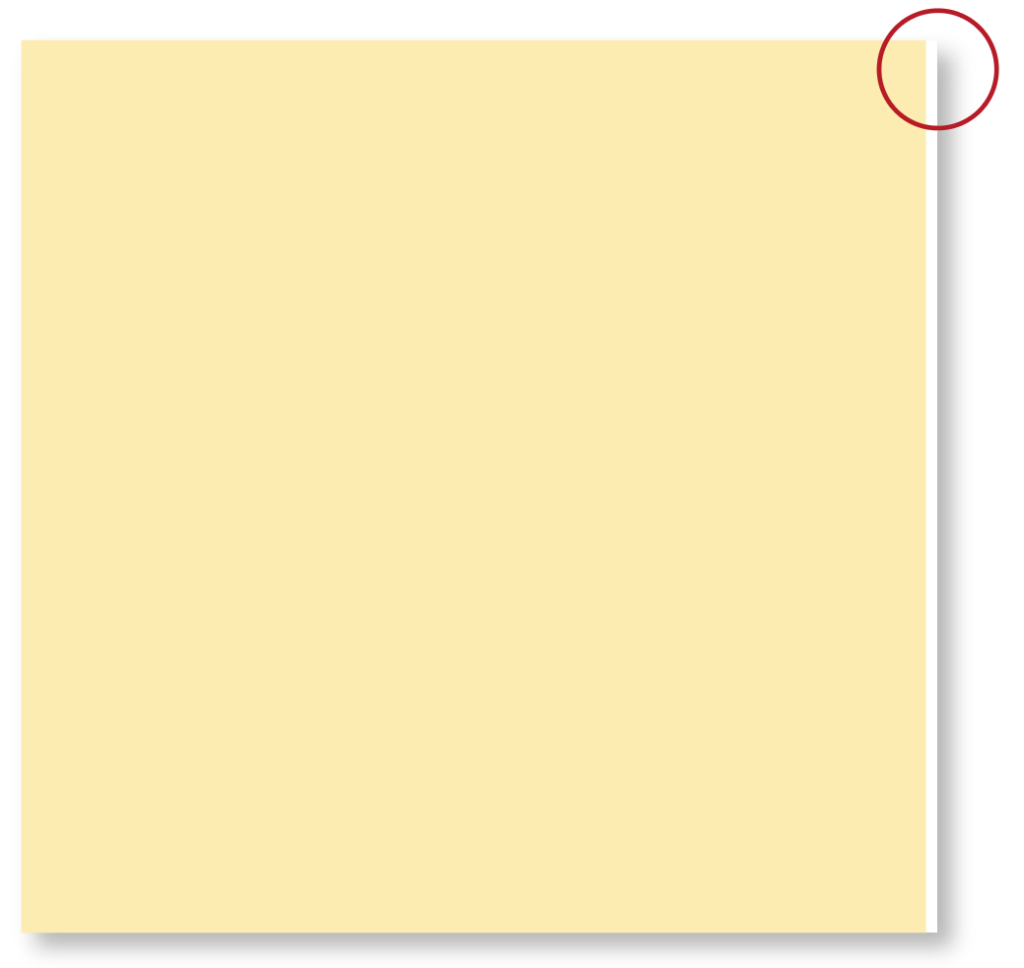
This image above shows what would happen if no bleed was created in the document.
With the advance of Adobe Acrobat, the PDF file format has become the standard file format used to transfer your artwork to printers for production. When you create a PDF file to be printed offset, or if you are creating a prototype for a client you will want to print out on an oversize paper from the final size and output the PDF to display the trim marks.
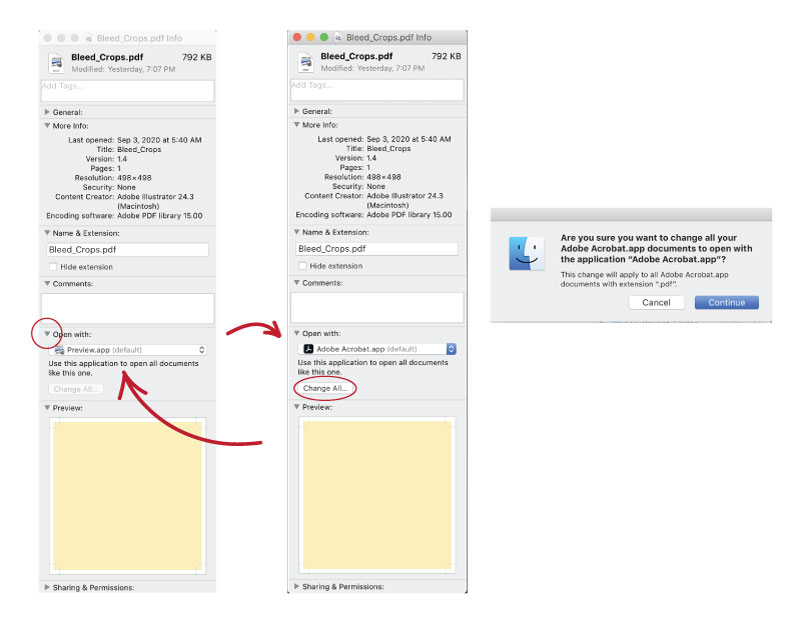
To REMAP your MAC to open all PDF files in Acrobat Pro:
- Select a PDF file on your desktop.
- Hold down the Command Key and Hit the letter i.
- The Information Box will appear.
- Un-twirl the application area and change the default to Acrobat.
MAKING A PDF FROM AN IN-DESIGN FILE
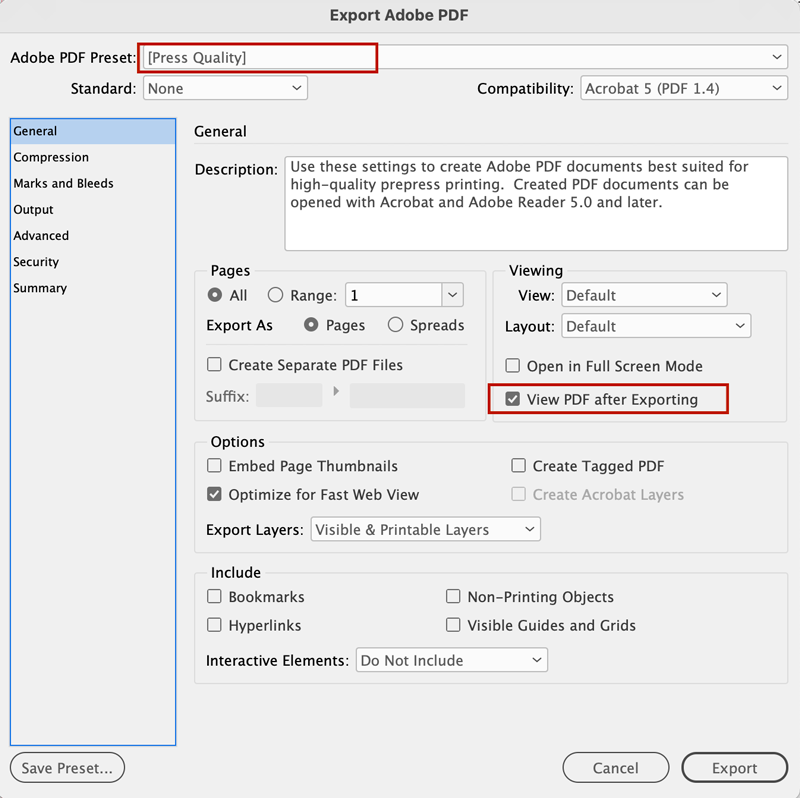
TO CREATE A PDF FROM AN IN-DESIGN FILE
- Go to FILE / ADOBE PDF PRESETS/PRESS QUALITY
In-Design will save your file name the same as your In-Design file name. - When the Adobe dialog box appears you will need to look at two menus. The first menu that appears is the GENERAL menu. Select the quality of PDF for your final destination. Be sure that the View PDF after Saving box is checked on. This will automatically open the pdf file after it is rendered so that you can review it for accuracy. Note: Make sure that you have pointed all your PDF file types to open in Adobe Acrobat, or it may open in the default Preview Mac application. (See how to do that just above this section.)
3. Select the Marks and Bleeds Menu in the left-hand column. (See below).
4. In the Marks section, check the Crop Marks box and in the Bleed and Slug section, check the Use Document Bleed Settings.

IN-DESIGN can be a bit confusing with their nomenclature when you want to create a PDF with trim / crop marks.
In ILLUSTRATOR, the term used is TRIM MARK, but in IN-DESIGN, the term is CROP MARK, not to be confused with a bleed mark. The bleed mark in In-Design puts marks at the outside of your bleed area, which is WIDER, than your trim / crop area. Notice how the first image below is right at the end of the blue box, so if you used that as a trim, you would potentially have a white line. The second image show how the TRIM / CROP marks look on your PDF. You should see the color extending into the trim marks. The third image shows you what your PDF would look like if you have both the Bleed and Trim mark selected on when you render your PDF.
For our projects, we only need to have the TRIM/CROP marks selected, plus the Use Document Bleed box checked.
