Organize your downloaded
fonts in one place!
Graphic designers work with thousands of fonts. It is prudent to have a system for managing your fonts.
When you download fonts to use in your work, I have found the best way to manage them is to CREATE A FOLDER IN YOUR DOWNLOAD FOLDER named FONTS. This way should you get a new computer or need to transfer any font to another user, you will have read access to find them.
The font comes usually in a .zip file.
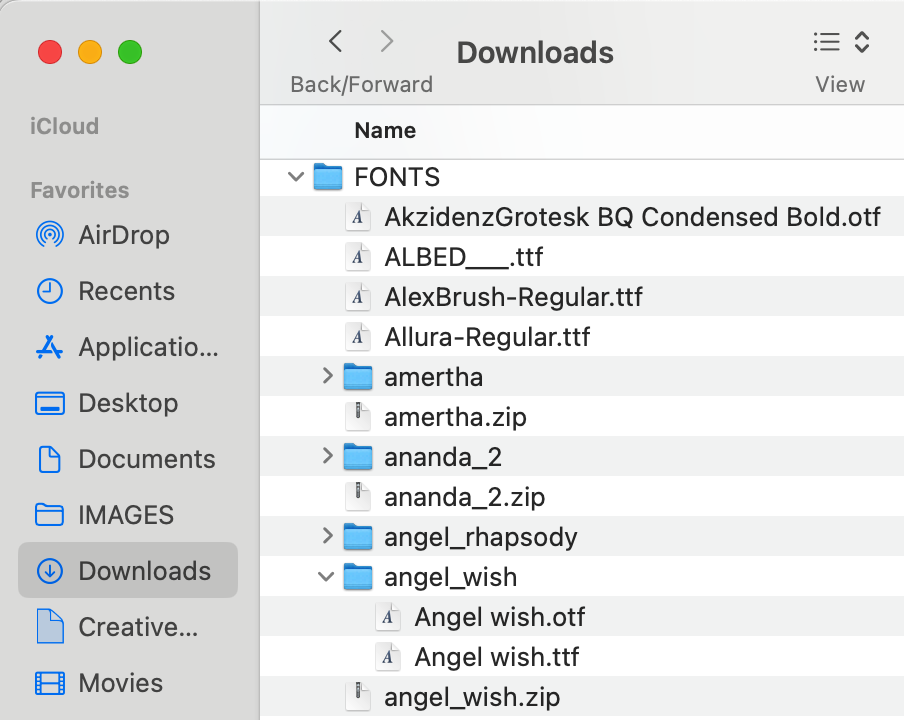
Notice in the screenshot at the top of the page of my DOWNLOAD FOLDER, there are files with a .zip file
extension such as angel_wish.zip. That is the downloaded zipped font file.
If you double click on that file, it will uncompress.
Sometimes it uncompresses into a folder or it may simply unzip into a type file.
In the example above notice angel_wish.zip uncompressed into a Folder named (angel_wish) with two files in it.
Notice there are two fonts with different extensions on them:
1. Angel wish.otf (open type face) and
2. Angel wish.ttf (true type face)
Open type faces (.otf) offer more options and features such as decorations, ligatures, and symbols.
So that is the better file type to install on your computer.
But you can install both.
To Manually Install a Font
1. Go to your application folder and find the program called FONT BOOK.
You can drag this program onto your menu for easy access next time you need to install a font.
Open the application.
2. Go to FILE/ADD FONT TO CURRENT USER.
3. A popup men will appear. Go to the FONT Folder in your Download Folder
and locate the unzipped font or folder.
Select that font or folder and click OPEN and the font(s) will be automatically installed.
The font will appear in all your software programs in the Character Menu.
Note: Fonts come with licensing restrictions, so be sure you read the legal permissions of the download. Some are for Personal Use Only and if you are going to be using fonts for a client, you need to pay for them to avoid a lawsuit.