Making print-ready documents in illustrator
STEP 1:
Bleeds are created when setting up your document. You can find the bleed settings under the document size. Bleed settings create guidelines that sit outside of the artboard.
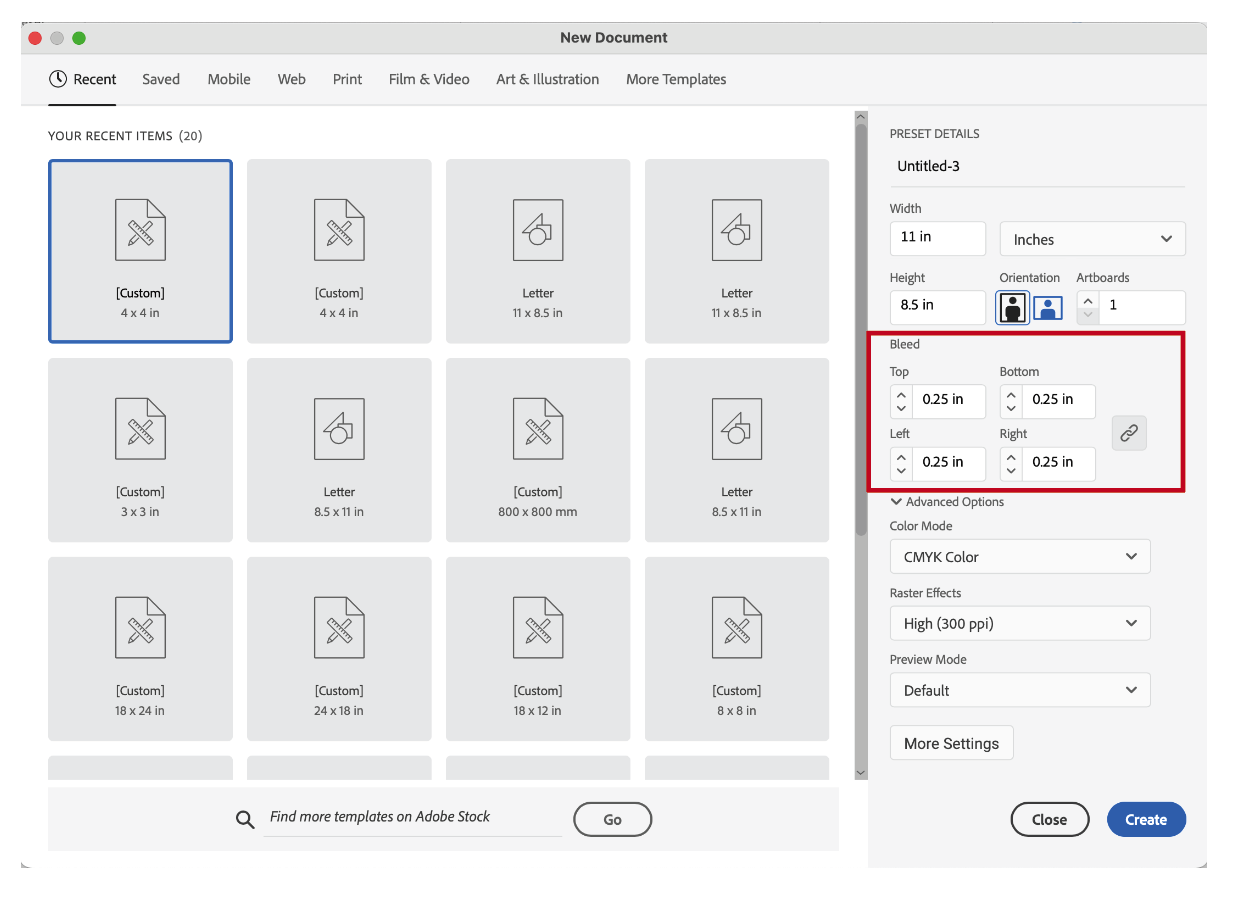
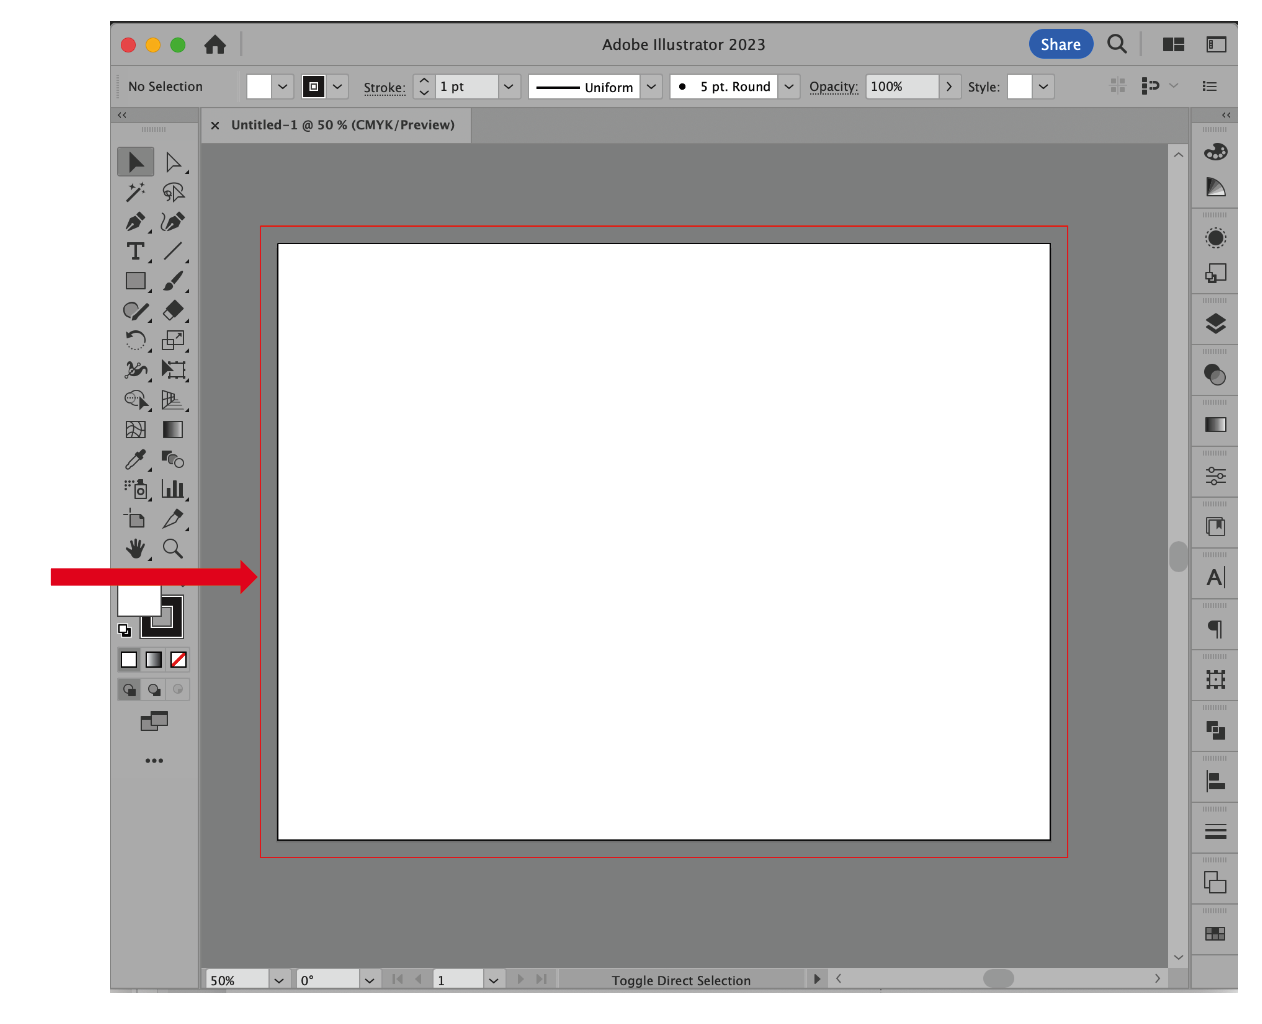
The red bleed line appears on the scratch area outside of the white artboard .25″ away from the black trim line of your document. It does not print.
You cannot do a full-bleed on a desktop copier as your design must print on larger paper with the image “oversize” then cut (or trimmed) down to size. Printing on a desktop printer/copier using letter-size paper will result in a white border around your paper.
TIP:
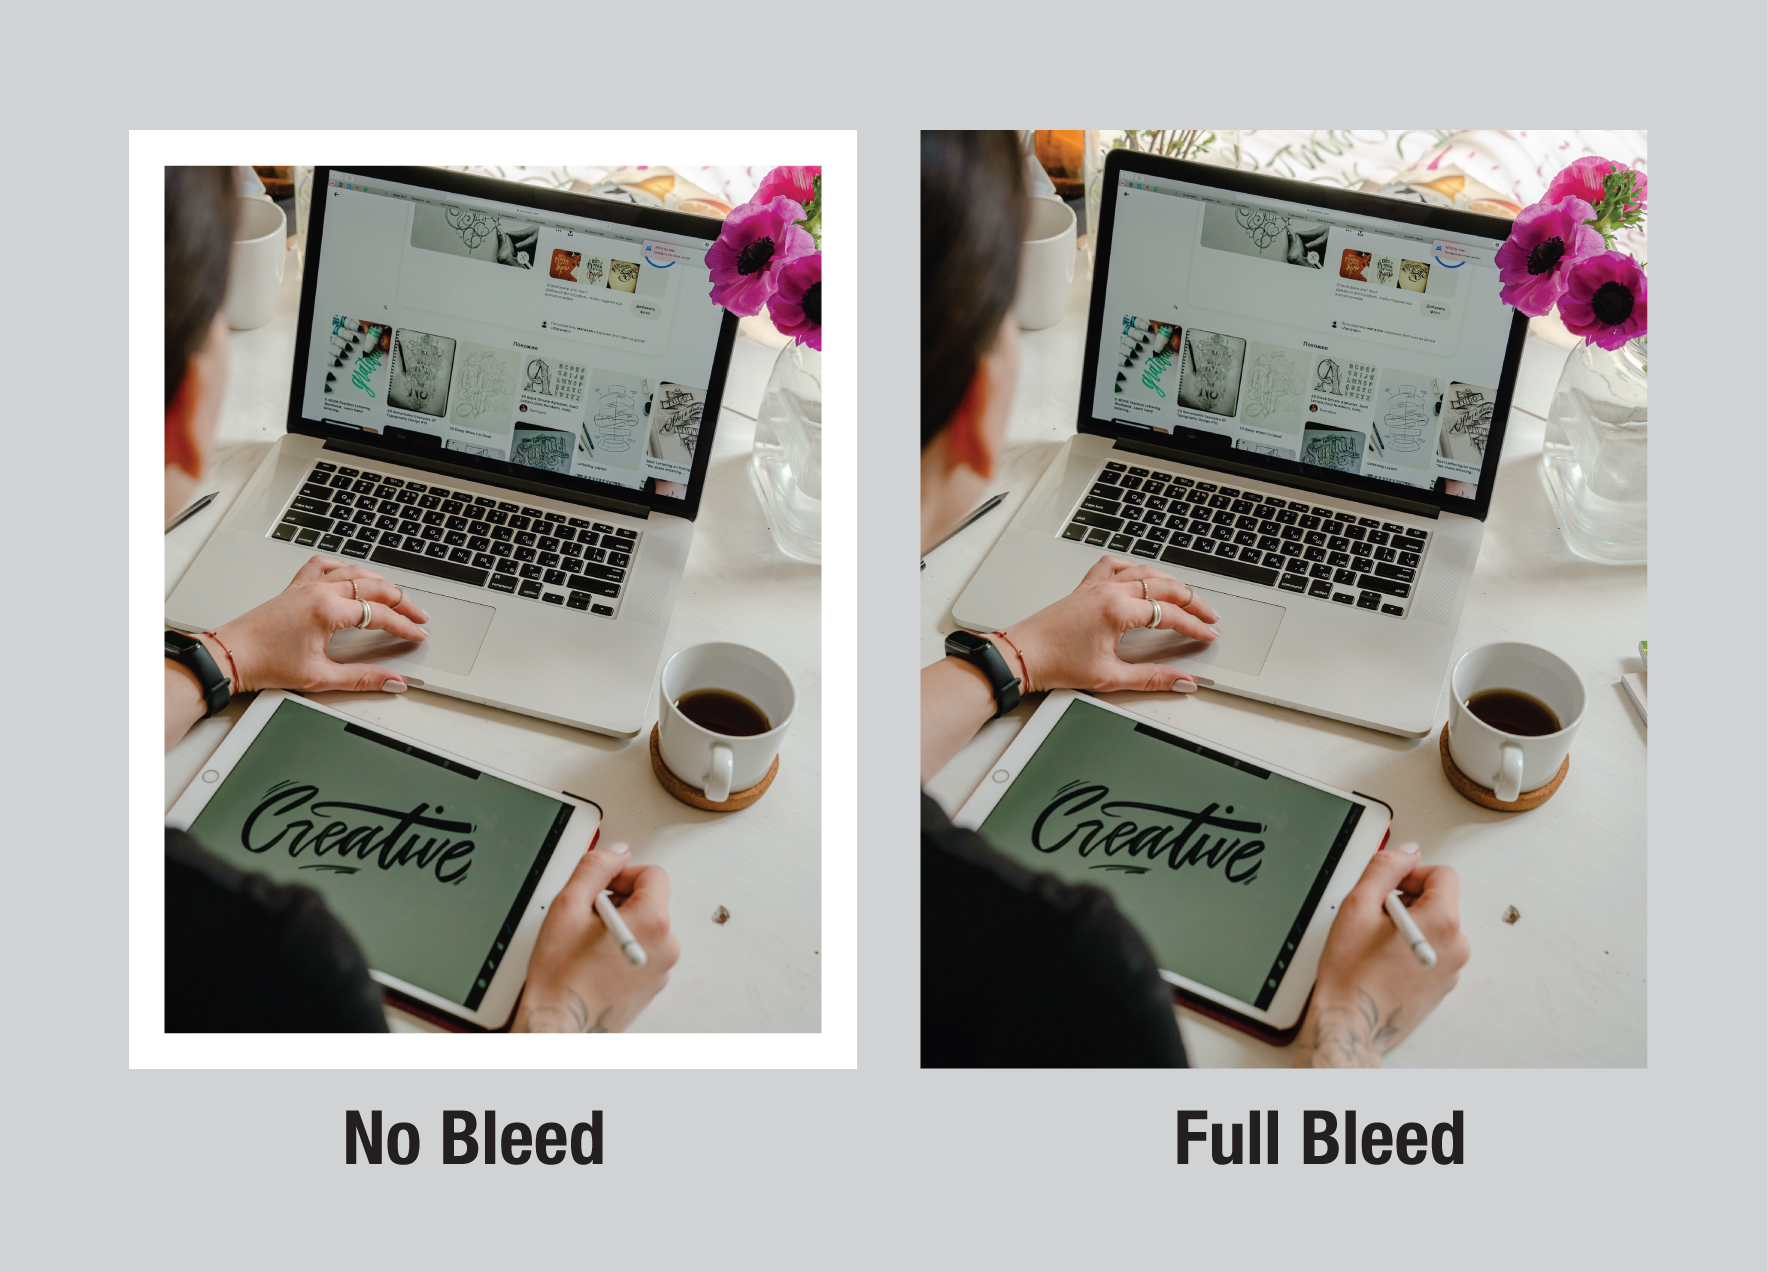
When you want a color background to print to the edge of your document, you will have to pull the color out to the red bleed guideline.
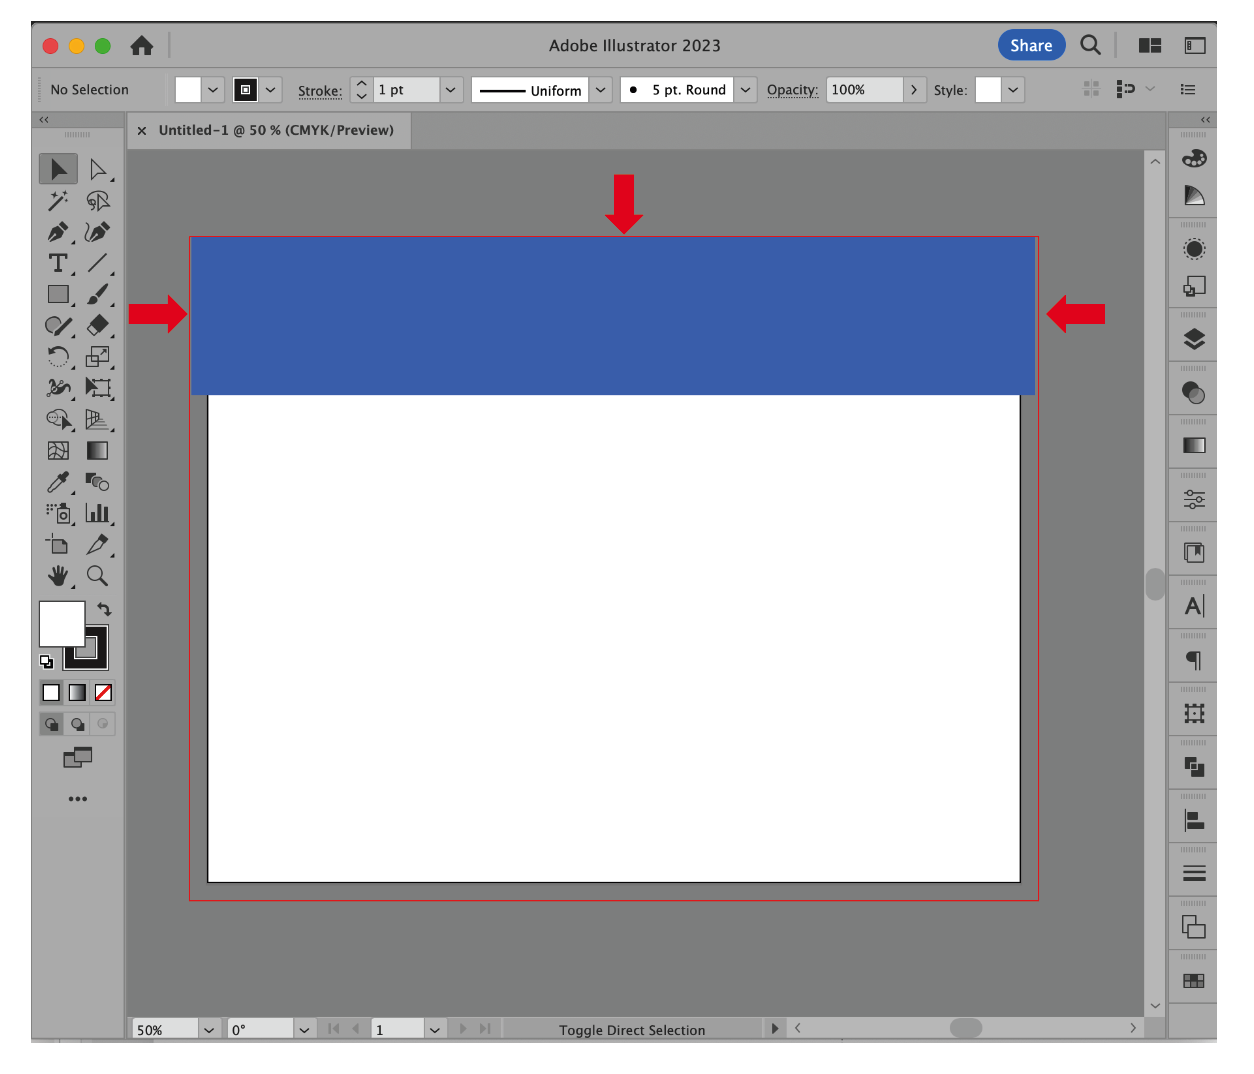
This technique is the same for using photos that bleed off the page. They must be extended to the red bleed guideline. Choose photos that have enough room to accommodate a bleed.

STEP 2:
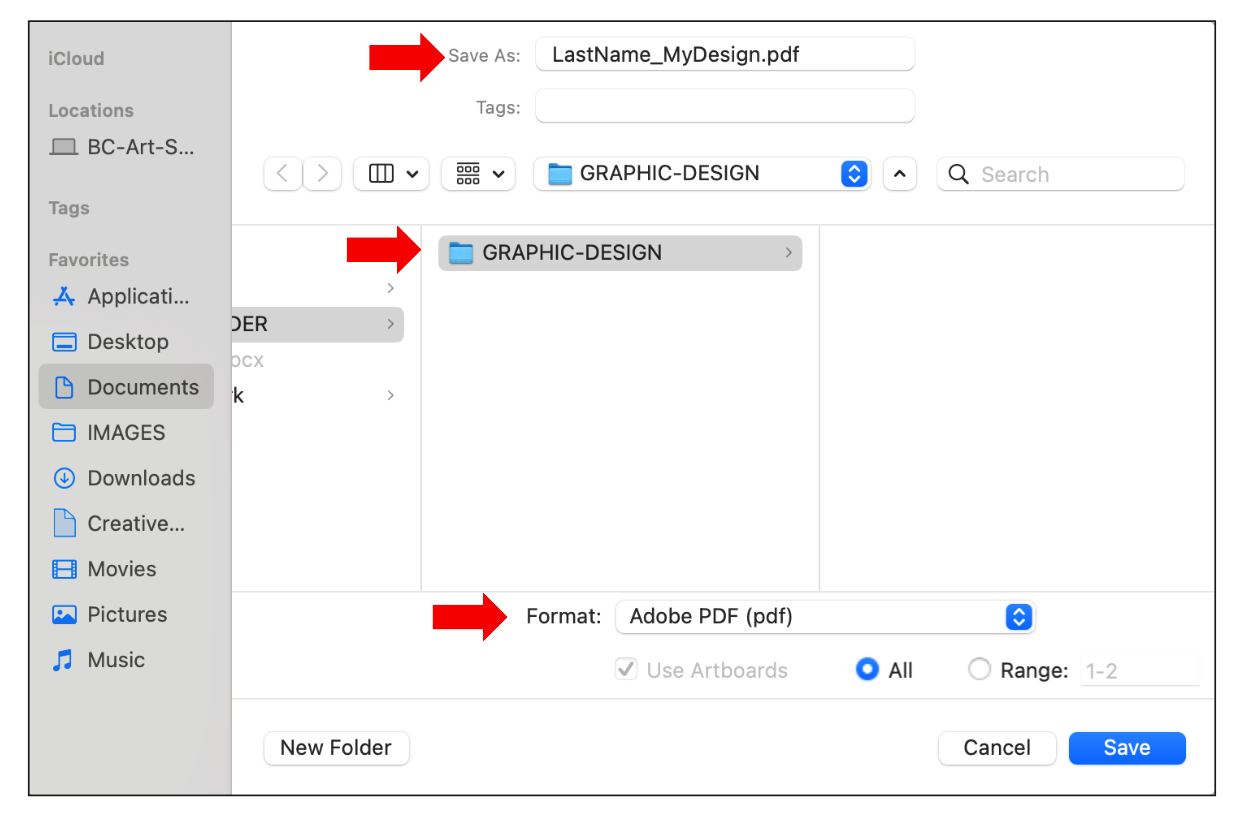
To make a PDF for the printer in ILLLUSTRATOR:
Go to FILE / SAVE A COPY — NOT Save as!
FILE/SAVE A COPY
A popup box appears.
Direct your file to your PROJECT FOLDER
Name your file starting with your LASTNAME.
Change the dropdown format to Adobe PDF (pdf), then click on the blue SAVE button.
Be sure to delete the word “copy” from the file name and be sure the file name begins with your last name.
STEP 3:
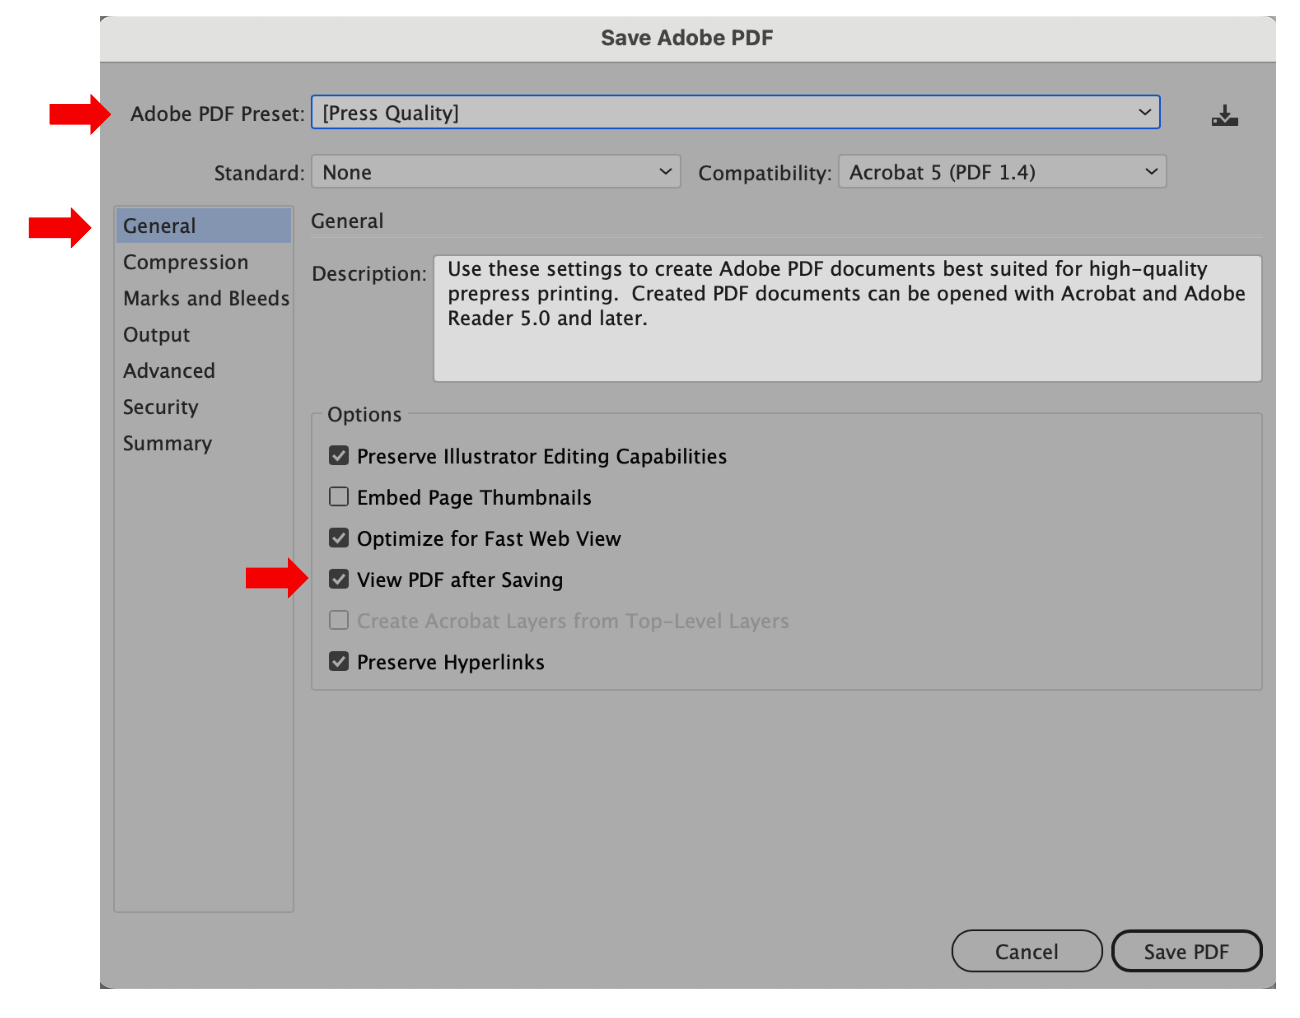
The Adobe Acrobat popup menu will appear in the General tab.
Change the Adobe PDF Preset dropdown field to: [Press Quality]
Check the View PDF after Saving box. This checkbox will automatically open Acrobat so you can easily proof your print-ready document and make sure the proper TRIM marks are on your document file for the printer.
STEP 4:
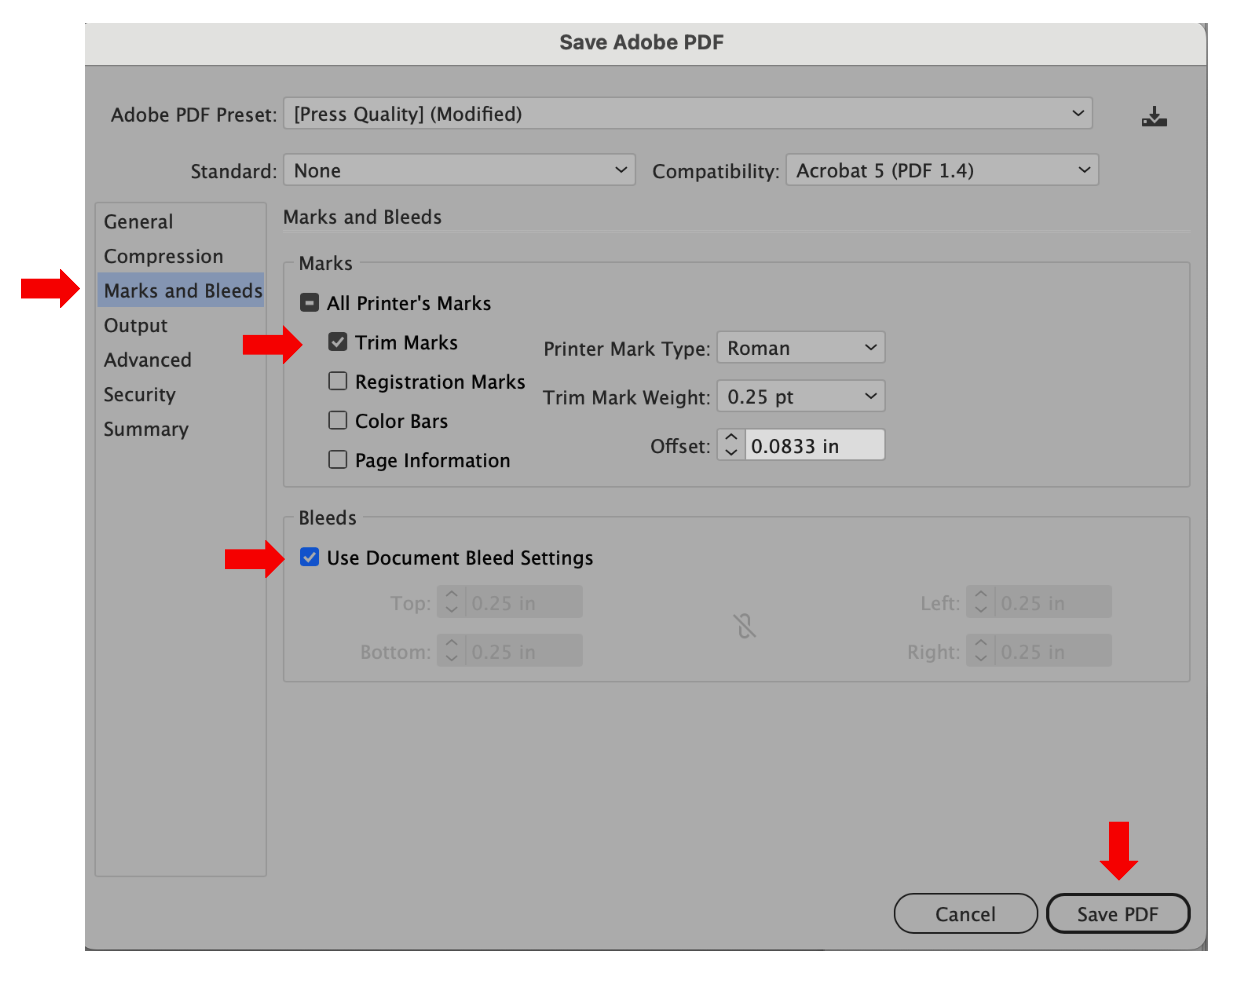
Click on the Marks and Bleeds tab in the left-hand menu bar.
> In the Marks Section check ONLY the Trim Marks box
>In the Bleeds section check Use Document Bleed Settings box.
Notice that the bleed measurements appear dimmed below the check box.
Click on the Save PDF button.
STEP 5: PROOF YOUR FILE!
When Acrobat opens your file, check your PDF that you have the correct printer’s TRIM marks on your document. If Acrobat doesn’t automatically open, make sure that you check the box in the General tab to “View PDF After Saving” (See Step 4), or you may have not mapped your extensions to open in your Adobe applications (See Setting up your desktop).
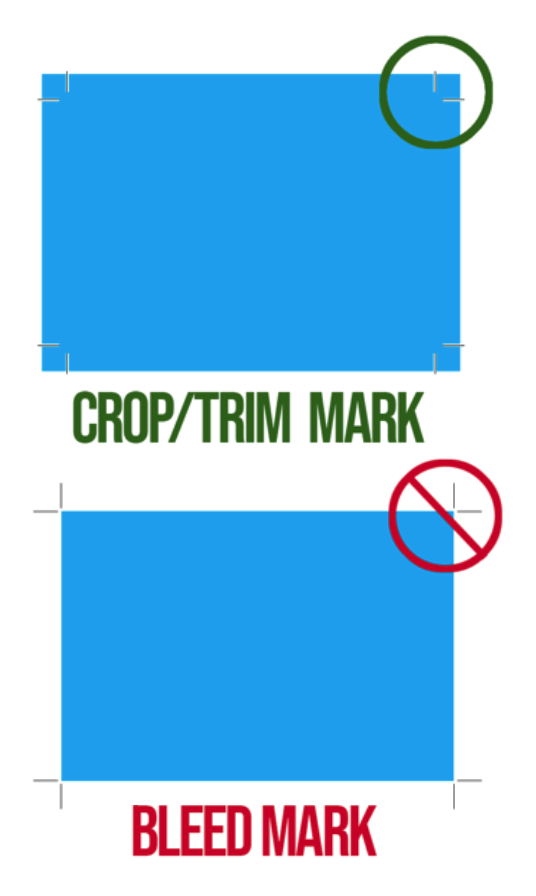
Notice that the TRIM/CROP marks intersects the color on the page, while the Bleed marks do not. You must have the TRIM/CROP marks to know where to cut the paper to the final size.